111761 views 475 likes 17 dislikes
Channel: WerkMaster Grinders & Sanders Inc.
DIY – How to Polish Concrete with the WerkMaster Scarab – Floor Grinder. Use the WerkMaster Scarab to remove coatings and polish concrete on small jobs or in hard to reach areas like bathrooms and stairs.
The video demonstrates the complete polishing process using WerkMaster diamond abrasive tooling, WerkMaster ULTRAhard Lithium densifier(hardener) and ULTRAguard floor sealer.
Our complete WerkMaster Systems & Solutions are available at www.werkmaster.com.
Video Transcript:
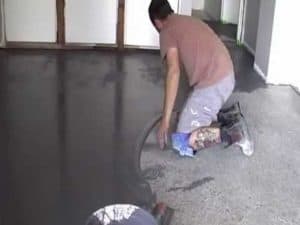
Hi, I’m Graeme from Werkmaster. Today we are going to show you how to grind and polish concrete using our Scarab.
First, we need to remove the paint from this concrete floor.
To do that, we will use our 16 grit turbo shark tools
Simply fit the turbo shark plates with the yellow compression foam into the grommets on the Scarab.
Next, position the dust skirt so that there is approximately 1/8” inch or 3 millimetres off the ground.
Make sure your vacuum hose is connected to the Scarab.
Set the speed on your variable speed polisher – always start at a low speed, and gradually increase the RPM as required.
Keep the Scarab in motion to avoid putting tool marks in the floor.
Use the Scarab to get to within 1/8 inch to the wall.
Continue grinding until all the paint and contamination is removed, and you have reached the desired level of aggregate exposure.
You can now change over to the 30/40 grit teardrop tooling.
Once all the floor has been evenly ground, move on to the 70/80 grit teardrop tooling.
Now you are ready to do any cosmetic repairs to the concrete.
Remove any loose material and vacuum thoroughly.
Fill the holes and cracks with an approved patching compound.
Keep in mind, deep holes may need more than one application of patching compound.
When the patching compound is dry, remove any excess with the same 70/80 grit teardrop tooling.
Now you are ready to use your transitional tooling.
In this case, we are using the 100g Achromic tooling.
Use the foam Velcro adaptor plates with the yellow compression foam, then attach the Achromic tools.
You will need to adjust the height of the dust skirt again to ensure you are 1/8 inch or 3 mm off the floor.
When all the scratches from the metal bond tooling have been removed, you are ready to move on to the next step – Densification.
Vacuum the floor thoroughly before you apply the Densifier
We are using WerkMaster’s UltraHard Lithium Silicate Densifier.
Use a pump sprayer to dampen the microfiber applicator and to spray the UltraHard Densifier on the floor.
Apply enough Densifier to Fill the pores of the concrete to rejection.
Work the Densifier into the floor and make sure there are no puddles.
The floor should stay looking wet for about 5 minutes.
Now that the floor has been densified, we are ready to move to our polishing resins – we are starting with 200 grit.
For best results, thoroughly refine the floor with the polishing resins.
Follow the same process of refining the floor with the 400, 800, 1500, & 3000 grit resins.
Once the level appropriate of polish has been achieved, thoroughly vacuum the floor before you apply the UltraGuard.
Take a clean microfibre applicator, and apply a small amount of UltraGuard to it and a light coat on the floor
Allow to dry for a minimum 45 minutes
If your burnishing between coats, use a pink burnishing pad.
Apply a second coat of UltraGuar and allow it to dry.
Burnish with a pink pad.
Thanks for watching. For more information on our WerkMaster Systems and solutions please visit our website.
WerkMaster Scarab
Scarab Grinder
Remove Epoxy Paint
How to remove epoxy
Polished Concrete
Video length: 5:20
Category: Howto & Style
9 comments
* This video was originally published here
Find a local concrete contractor in your area to help you with your concrete flooring needs by searching here on Concrete Floor Pros.
#concretefloorpros